

Welding might look simple at first glance, but behind every strong, flawless joint is a series of precise steps and careful checks. Surprisingly, proper personal protective equipment can reduce workplace injuries in welding by a significant margin, and yet so many beginners skip critical safety details in their rush to get started. What most people miss is that the way you prepare and maintain your gear actually shapes the quality and strength of every weld you make.
Table of Contents
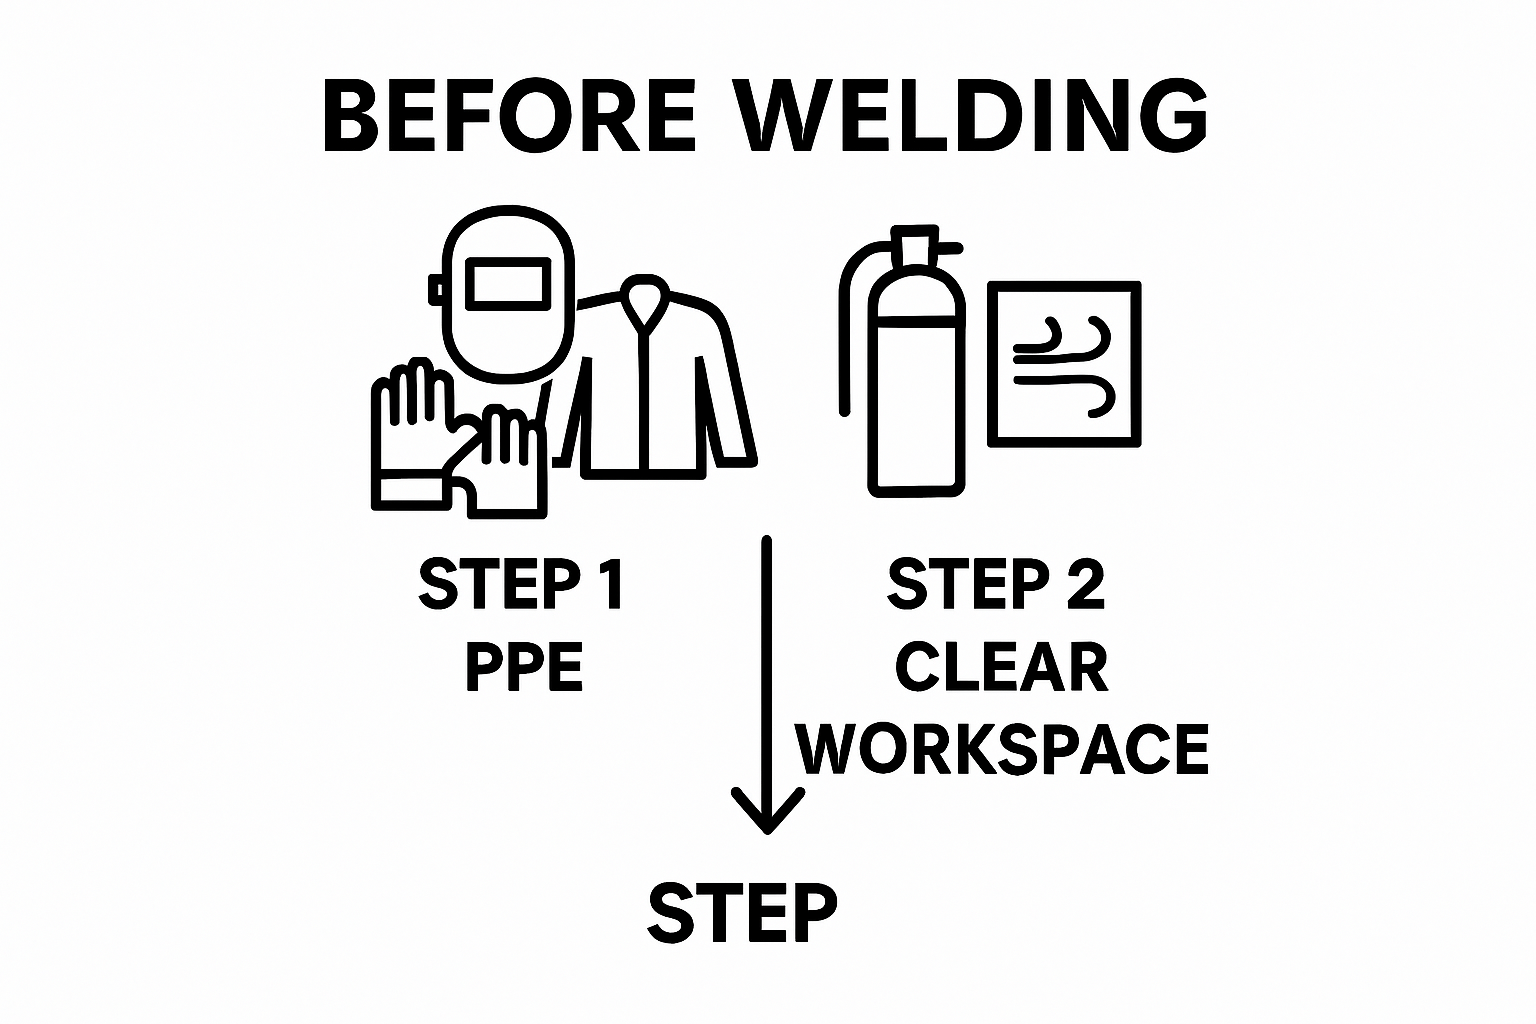
- Step 1: Gather Essential Welding Equipment
- Step 2: Prepare Your Workspace For Safety
- Step 3: Set Up The Welding Machine Correctly
- Step 4: Perform Welding Techniques With Precision
- Step 5: Inspect Welds For Quality And Strength
- Step 6: Maintain Equipment After Welding
Quick Summary
| Key Point | Explanation |
|---|---|
| 1. Invest in Quality PPE | High-quality personal protective equipment is crucial for safety, shielding you from heat, sparks, and radiation risks during welding. |
| 2. Create a Safe Workspace | Ensure a clean, ventilated workspace free of flammable materials to prevent accidents and promote focus on the welding task. |
| 3. Correct Machine Setup is Essential | Proper configuration of the welding machine, including voltage and wire feed settings, is vital for achieving high-quality welds and safety. |
| 4. Master Welding Techniques | Maintain a steady hand, proper angles, and consistent arc length for strong, clean welds that meet professional standards. |
| 5. Regularly Maintain Equipment | Post-welding maintenance extends the life of your tools and ensures reliable performance by keeping equipment clean and in good condition. |
Step 1: Gather Essential Welding Equipment
Welding starts with having the right gear. Your equipment is more than just tools - it’s your lifeline between a successful project and a potential safety disaster. Understanding what you need before striking an arc can save you time, money, and potentially prevent serious injury.
Personal Protective Equipment (PPE) is Your First Priority
Before touching a single welding tool, you need comprehensive protection. This means investing in high quality gear that shields you from intense heat, sparks, and potentially harmful radiation. Start with a professional grade welding helmet that provides full face coverage with auto darkening technology. These helmets automatically adjust shade levels when the arc starts, protecting your eyes from potentially blinding light.
Your protective clothing should be flame resistant and cover your entire body. This means thick leather welding gloves, a sturdy leather apron or jacket, long pants made from heavy cotton or leather, and steel toed boots that protect against falling objects and hot metal splatter. According to National Institute for Occupational Safety and Health, proper PPE dramatically reduces workplace injury risks in welding environments.
Essential Tools and Equipment Checklist
Beyond protective gear, you’ll need specific welding tools tailored to your chosen method. For most welding techniques, this includes:
- Welding machine appropriate for your specific project
- Electrode or wire feed system
- Welding electrodes matching your material
- Angle grinder for metal preparation
- Chipping hammer for removing slag
- Metal brushes for cleaning weld surfaces
- Measuring and marking tools
- Fire extinguisher (mandatory safety requirement)
Remember that quality matters more than quantity. Invest in reliable equipment from reputable manufacturers, and always prioritize safety over cost cutting. Each piece of equipment plays a crucial role in creating strong, clean welds while keeping you protected from potential hazards.
Below is a table summarizing the essential tools and equipment for welding, highlighting their main purpose and any important notes for beginner welders.
| Tool/Equipment | Main Purpose | Notes/Specifications |
|---|---|---|
| Welding Machine | Generates the arc for welding | Choose type based on project/material |
| Electrode/Wire Feed System | Feeds filler material to joint | Match electrode/wire to work material |
| Welding Helmet (Auto-Dark) | Protects eyes and face from arc and sparks | Essential for safety and comfort |
| Leather Gloves | Hand protection against heat and sparks | Flame-resistant, thick leather |
| Leather Apron or Jacket | Body protection from heat and splatter | Should cover chest and torso completely |
| Angle Grinder | Prepares metal surfaces before welding | Used for cleaning and smoothing edges |
| Chipping Hammer | Removes slag post-welding | Helps ensure strong, clean welds |
| Metal Brush | Cleans weld surfaces and tools | Use regularly for inspection and cleaning |
| Measuring & Marking Tools | Ensures accuracy of cuts and weld alignment | Tape measure, soapstone, etc. |
| Fire Extinguisher | Required safety equipment | Keep within arm’s reach at all times |
Step 2: Prepare Your Workspace for Safety
Safety isn’t just a suggestion in welding - it’s your absolute lifeline. Creating a secure workspace transforms your welding project from a potential hazard into a controlled, professional operation. Think of your workspace preparation as the foundation that determines whether you’ll walk away with a perfect weld or a potential disaster.
Clearing and Controlling Your Environment
Start by completely clearing a dedicated workspace. Remove anything combustible within at least 35 feet of your welding area. Wood, paper, cloth, and other flammable materials are your enemies when working with intense heat and sparks. Lay down fire-resistant welding blankets or metal sheets to create a protective barrier on your work surface. Your workspace should feel like a carefully designed safety zone where every potential risk has been anticipated and neutralized.
Ventilation is critical. If you’re working indoors, set up local exhaust ventilation systems that can capture and remove potentially toxic welding fumes. Open windows and doors to create cross ventilation, and consider using industrial fans to keep air moving. For those working in tight spaces, portable ventilation equipment becomes your best friend. Check out our guide on professional workwear for electricians to understand how proper gear complements your safety setup.
Essential Safety Verification Checklist
Before striking your first arc, perform a comprehensive safety check:
- Fire extinguisher placed within immediate reach
- No flammable materials within 35 feet
- Welding area clear of trip hazards
- Proper ventilation established
- All personal protective equipment ready and accessible
- Work surface covered with fire-resistant material
A well-prepared workspace isn’t just about preventing accidents - it’s about creating an environment where you can focus entirely on your craft. Take the time to set up properly, and you’ll not only protect yourself but also ensure a higher quality welding outcome.
This table organizes the main workspace safety checks that should be completed before welding, helping ensure a safe and controlled environment for the entire process.
| Safety Check | What to Confirm | Why It Matters |
|---|---|---|
| Fire extinguisher nearby | Within immediate reach | Quick response to accidental fires |
| Flammable materials removed | None within 35 feet | Reduces risk of fire or explosion |
| Clear of trip hazards | No clutter around work area | Prevents falls and accidents |
| Proper ventilation established | Airflow and fume extraction | Protects against inhalation of welding fumes |
| PPE accessible and ready | All gear within reach | Immediate access to personal safety equipment |
| Fire-resistant surface in place | Protective blankets or metal | Shields surfaces from sparks and hot metal |
Step 3: Set Up the Welding Machine Correctly
Setting up your welding machine isn’t just a technical task - it’s the critical bridge between your skill and a perfect weld. Each adjustment and connection determines the quality of your final work, transforming raw metal into precise, strong joints. Getting this step right means the difference between professional craftsmanship and a potential project failure.
Understanding Machine Configuration
Start by matching your welding machine to the specific project and material you’re working with. Different metals and thicknesses require unique voltage, amperage, and wire feed settings. If you’re working with thin sheet metal, you’ll need lower heat and slower wire feed speeds compared to thick structural steel. Take time to carefully read your machine’s manual and understand its specific capabilities. Most modern welding machines have digital displays that allow precise control - learn to read these like a professional translator converting complex instructions into actionable steps.
Carefully inspect all electrical connections before powering on. Loose connections can cause arcing, equipment damage, and serious safety risks. Ensure your ground clamp is securely attached to clean metal, creating a solid electrical circuit. This isn’t just about completing the connection - it’s about creating a stable, predictable welding environment where electricity flows exactly as you intend.
Critical Machine Setup Verification
Before striking your first arc, perform these essential checks:
- Verify correct electrode or wire type for your specific material
- Check ground clamp connection is tight and clean
- Confirm voltage and amperage settings match material thickness
- Inspect electrical cables for any visible damage
- Ensure machine is on a stable, dry surface
According to Occupational Safety and Health Administration guidelines, proper machine setup is fundamental to preventing workplace accidents. Treat your welding machine like a precision instrument - respect its capabilities, understand its nuances, and it will consistently deliver exceptional results.
Step 4: Perform Welding Techniques with Precision
Welding is an art form where precision separates professional craftsmanship from amateur attempts. Your technique determines whether you create a strong, clean weld or a weak, unsightly joint that could compromise entire structural integrity. Understanding how to move, angle, and control your welding equipment becomes crucial in transforming raw metal into a seamless connection.
Mastering Your Welding Motion
Think of welding like drawing a continuous, controlled line. Your hand movement must be steady, smooth, and consistent. Start by maintaining a 15 to 20-degree work angle between your electrode or welding gun and the metal surface. This angle allows optimal heat distribution and penetration. Move at a pace that allows the weld pool to form evenly - too fast, and you’ll create shallow, weak welds; too slow, and you’ll burn through the material. Practice developing a rhythm where your movement becomes almost instinctive, like a musician finding their groove.
The arc length is another critical factor in precision welding. Keep your electrode or welding tip close to the work surface, typically no more than the diameter of the electrode itself. Maintaining a consistent arc length prevents excessive splatter and ensures uniform heat distribution. Listen to the sound of your arc - a consistent, steady crackling indicates you’re executing the technique correctly. An inconsistent or popping sound suggests you need to adjust your technique or machine settings.
Precision Welding Performance Checklist
To verify your welding precision, evaluate these key indicators:
- Consistent weld bead width and appearance
- Minimal to no visible splatter
- Smooth, uniform penetration
- No undercut or overlap on weld edges
- Clean, uniform color along the weld line
According to advanced welding technique research, precision isn’t just about technique - it’s about understanding how heat, motion, and material interact. Treat each weld as a unique challenge, requiring your full concentration and skill.
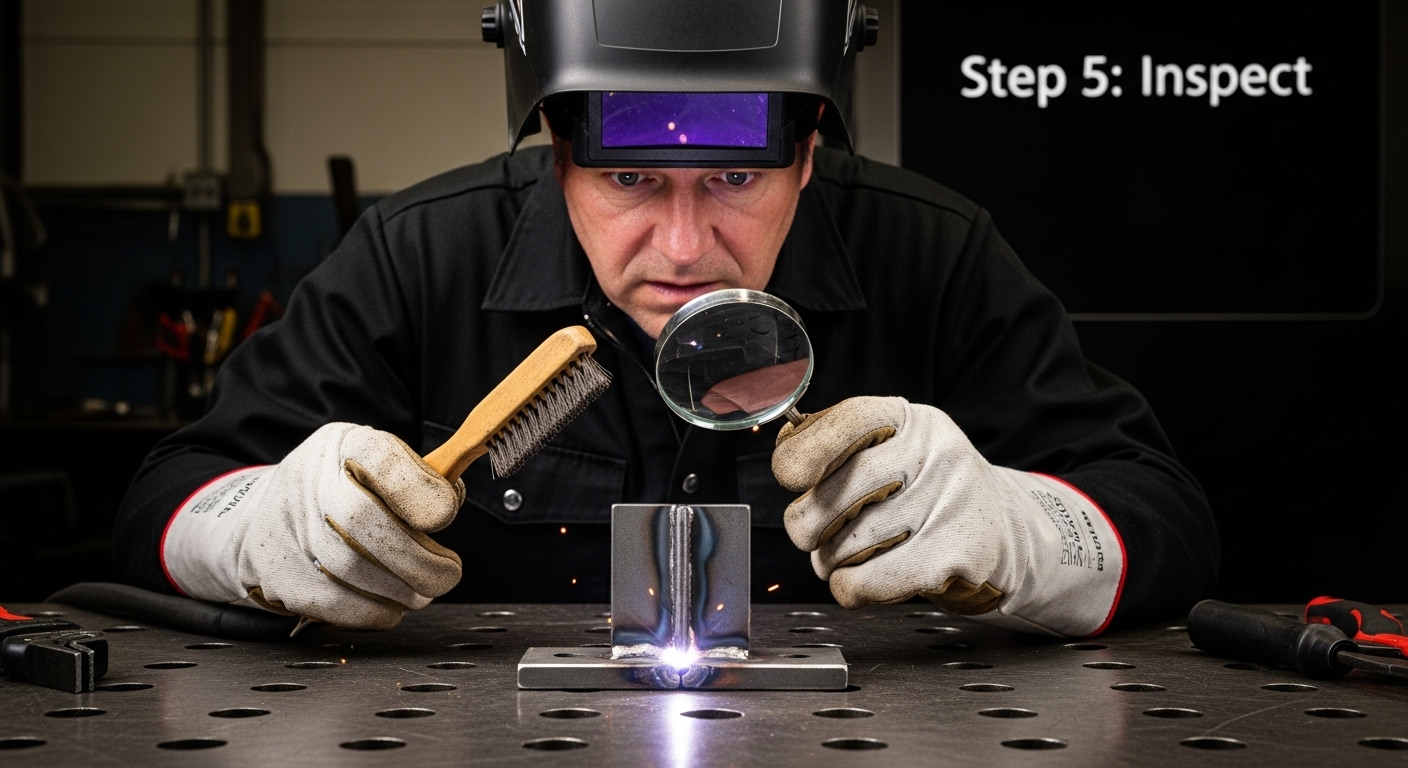
Step 5: Inspect Welds for Quality and Strength
Welding isn’t complete when the arc stops - it’s complete when you’ve verified every millimeter of your work meets professional standards. Quality inspection transforms a raw weld into a reliable, safe connection that can withstand real-world stress and environmental challenges. Think of this step as your final quality control checkpoint where precision and thoroughness determine the integrity of your entire project.
Visual and Physical Inspection Techniques
Begin your inspection by thoroughly cleaning the weld surface. Use a wire brush or grinder to remove any slag or excess material that might obscure potential defects. Look for consistent weld bead appearance - uniform width, smooth transitions, and no visible undercuts or overlap are critical indicators of quality. Run your gloved hand along the weld, feeling for any unexpected ridges, valleys, or irregularities. Professional welders develop a tactile sense that complements visual assessment, detecting imperfections that might escape casual observation.
Magnification can be your best friend in detailed inspection. Use a welding inspection magnifying glass to examine weld penetration, checking for potential cracks, porosity, or incomplete fusion. Pay special attention to the weld’s edges and root, where structural weaknesses most commonly develop. Color and texture variations can signal potential material stress or incomplete welding technique. Remember that what looks acceptable at first glance might reveal critical flaws under closer examination.
Comprehensive Weld Quality Verification
Complete your inspection by checking these essential quality markers:
- No visible cracks or crater formations
- Consistent weld bead width and profile
- Full metal penetration at joint interfaces
- Absence of slag inclusions or porosity
- Smooth transition between base metal and weld
According to welding quality management research, systematic inspection isn’t just about identifying defects - it’s about understanding how your welding technique impacts overall structural integrity. Treat each inspection as a learning opportunity to refine your skills and ensure professional-grade results.
Step 6: Maintain Equipment After Welding
Equipment maintenance isn’t a chore - it’s an investment in your future performance and safety. Professional welders understand that the moments after completing a project are just as critical as the welding process itself. Proper post-welding maintenance extends your equipment’s lifespan, ensures consistent performance, and prevents costly repairs or replacements.
Cleaning and Immediate Care
Start by thoroughly cleaning your welding equipment while everything is still warm. Use a wire brush to remove slag, spatter, and any metal residue from your welding gun, electrodes, and surrounding equipment. Pay special attention to electrical connections and moving parts, as accumulated debris can cause future malfunctions. For MIG welding, clean the wire feed mechanism and check the liner for any accumulated metal particles. Compressed air can be an excellent tool for blowing out tight spaces and removing fine metal dust that standard brushing might miss.
Electrical components require careful handling. Disconnect your welding machine and ground clamps, then wipe down all surfaces with a clean, dry cloth. Inspect cables for any signs of wear, fraying, or heat damage. Small nicks or cuts in cable insulation can become significant safety hazards if left unchecked. Store your equipment in a dry, cool environment away from potential moisture or extreme temperature fluctuations. Proper storage isn’t just about preventing rust - it’s about maintaining the precision calibration of your welding tools.
Equipment Maintenance Verification Checklist
Complete your maintenance routine by confirming these critical steps:
- All metal surfaces cleaned of slag and spatter
- Electrical connections inspected and wiped down
- Cables checked for wear or damage
- Equipment stored in dry, temperature-controlled space
- Protective covers placed on welding gun and machine
- Unused electrodes or wire stored in sealed containers
Treat your welding equipment like a precision instrument. The time you invest in careful maintenance translates directly into reliable performance, enhanced safety, and professional-grade results in every future project.
Dress Like a Pro Welder: Upgrade Your Safety and Comfort Now
Taking your welding skills to the next level starts with the right knowledge – and the right gear. In our article, you learned how quality personal protective equipment and a safe workspace are crucial for strong, precise welds. But let’s face it, most workwear either sacrifices comfort or doesn’t stand up to the demands of real welding. If you want gear that truly protects you and lasts through the toughest days, you need apparel designed for hardworking professionals like you.

Why settle for less when you can equip yourself with durable, comfortable clothing that reflects your resilience and pride? Whether you need flame-resistant shirts, rugged pants, or protective hoodies with UPF 50+ sun protection, discover options built for both safety and style. Make every weld count by checking out WorkwearComfort.com today. Explore our range built for welders who know the value of quality preparation and finish every project with confidence.
Frequently Asked Questions
What personal protective equipment (PPE) is essential for welding?
It’s crucial to have a professional-grade welding helmet with auto darkening technology, flame-resistant clothing, thick leather gloves, a sturdy leather apron or jacket, long pants made from heavyweight cotton or leather, and steel-toed boots to protect against heat, sparks, and radiation.
How do I prepare my workspace for welding?
To create a safe welding environment, remove any combustible materials from at least 35 feet around your workspace, establish proper ventilation, and lay down fire-resistant blankets or metal sheets. Ensure that fire extinguishers and all necessary PPE are easily accessible before starting.
What are the key steps in setting up a welding machine?
Begin by matching the welding machine to your project and material, ensuring the proper settings for voltage, amperage, and wire feed speed. Inspect all electrical connections for security, and confirm the ground clamp connection is tight and clean.
How can I verify the quality and strength of my welds?
Inspect your welds visually and physically after cleaning the weld surface. Look for consistent bead appearance, check for cracks or porosity, and use tactile feedback to identify any irregularities. A thorough inspection ensures your welds meet professional standards.