

Over sixty percent of American workers spend the majority of their day on their feet, making comfortable boots more than just a convenience. Facing long hours means that ill-fitting footwear can quickly lead to sore feet or even injury. This guide will help you choose, prepare, and break in new boots so you can stay focused on your work without worrying about discomfort.
Table of Contents
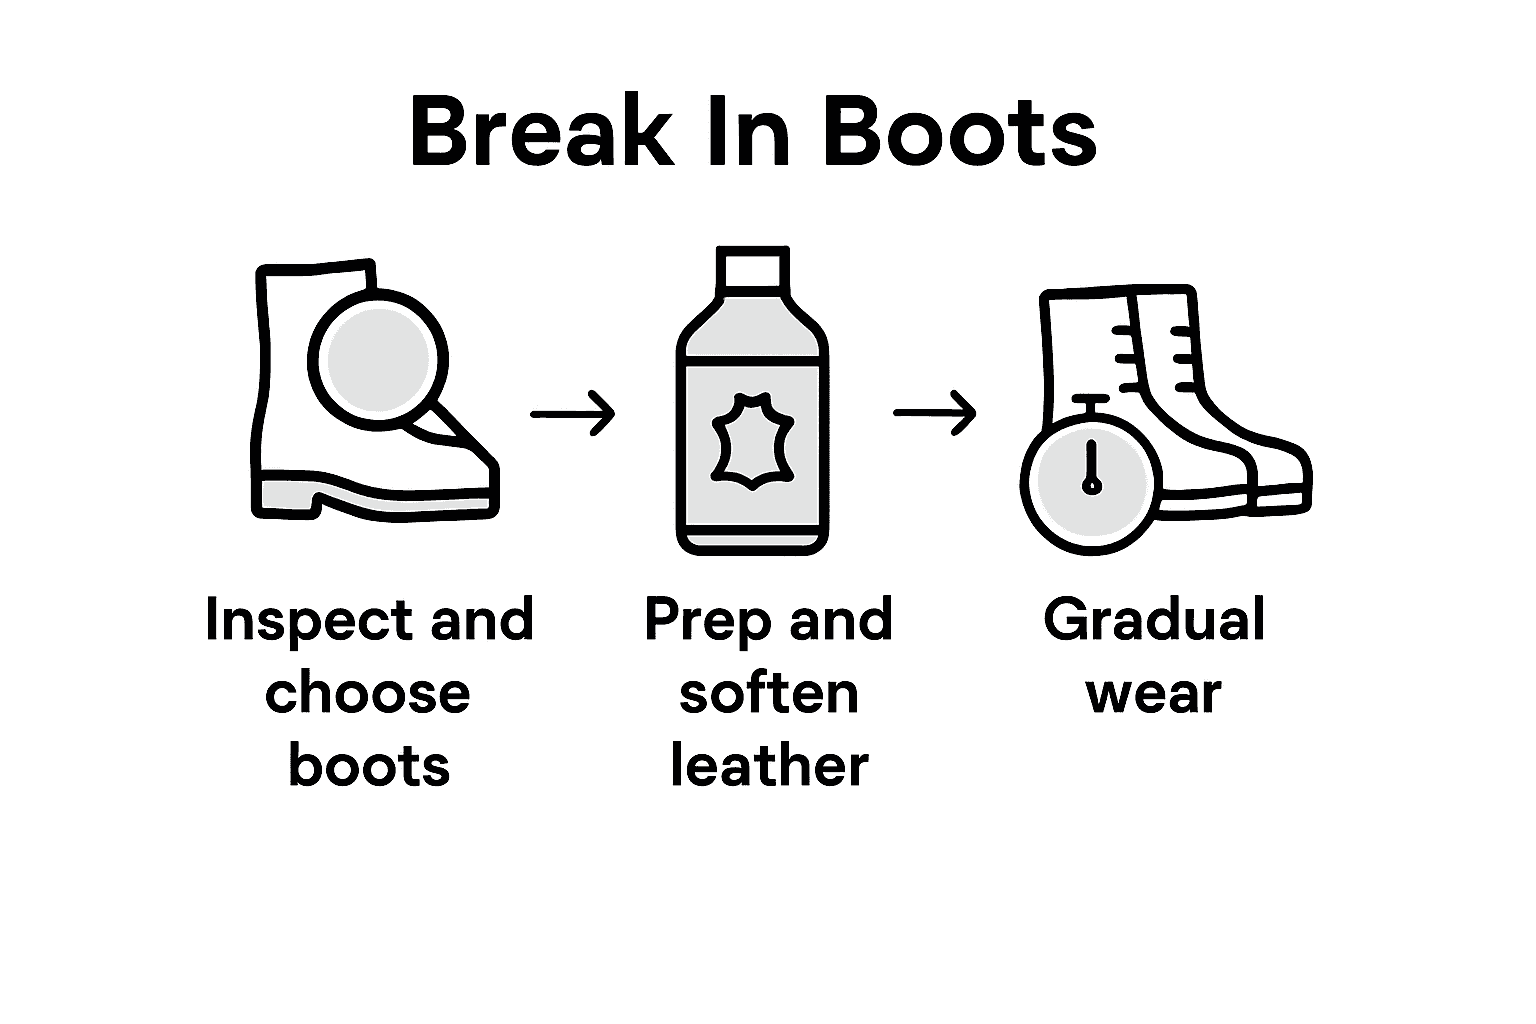
- Step 1: Choose And Inspect Your New Boots
- Step 2: Prep Boots For First Wear
- Step 3: Wear Boots For Short Intervals
- Step 4: Moisturize And Flex Key Areas
- Step 5: Test Comfort On The Job
Quick Summary
| Key Takeaway | Explanation |
|---|---|
| 1. Ensure Proper Fit of Boots | Comfort begins with finding boots that fit well. Try on different sizes and styles to avoid discomfort later. |
| 2. Gradually Break in New Boots | Start wearing new boots for short periods to let them mold to your feet, reducing the risk of blisters. |
| 3. Moisturize Leather for Flexibility | Use leather conditioner to soften stiff areas, making the boots more pliable and comfortable during use. |
| 4. Test Boots in Real Conditions | Before full-time use, wear boots in actual job settings to assess support and comfort under different conditions. |
| 5. Keep Spare Socks and Bandages | Bring extra socks and bandages to address any developing discomfort during work shifts, ensuring foot health and comfort. |
Step 1: Choose and inspect your new boots
Choosing the right boots is more than just grabbing a pair that looks good. You want boots that will keep you comfortable through long workdays and tough conditions. When selecting new footwear, focus on finding a pair that fits perfectly and provides the support you need.
Start by trying on boots in person and walking around to assess their fit. Ensure your toes don’t hit the front of the boot, as leather and materials will stretch slightly during the breaking in process but won’t increase in length. Pay close attention to how the boots feel when walking on different surfaces inclines. A proper fit is crucial to prevent discomfort during long work shifts, so take your time and be thorough.
Inspect the boots carefully before purchasing. Check the stitching quality, examine the sole attachment, and look for any potential weak points. Run your hands along the exterior to feel for any irregularities or potential manufacturing defects. Remember that a good pair of work boots is an investment in your comfort and safety.
Pro tip: Wear the exact type of socks you plan to use with these boots when trying them on to get the most accurate fit possible.
Here’s a quick overview of common causes of discomfort in new boots and practical solutions:
| Common Problem | Cause | Recommended Solution |
|---|---|---|
| Toe pain | Boots too short or narrow | Size up or choose wider model |
| Heel slipping | Boot heel area too loose | Use thicker socks or heel grips |
| Blisters on sides | Stiff or unconditioned leather | Apply leather conditioner, flex sides |
| Persistent pressure | Insufficient break-in time | Gradually increase wear time |
| Foot sweating | Non-breathable materials | Switch to moisture-wicking socks |
Step 2: Prep boots for first wear
Getting your new boots ready for their first wear requires some careful preparation to ensure maximum comfort and minimize potential discomfort. Your goal is to soften the leather and make the boots more flexible before you start wearing them extensively.
Soften the leather by applying a moisturizing leather cream or using a hair dryer on low heat to loosen the fibers. This process helps break in the material and reduces the likelihood of painful blisters during initial wear. When using a hair dryer, keep it moving constantly and maintain a safe distance to prevent damaging the leather. Work the cream or apply gentle heat evenly across the boot surface, paying special attention to areas that might cause friction like the heel and sides.
After softening, wear the boots around your home with thick socks to start molding them to your feet. Walk around on different surfaces to help the leather flex and conform to your foot shape. This gradual breaking in process will help create a custom fit and reduce the risk of painful pressure points during your first full workday.

Pro tip: Stuff the boots with thick socks or newspaper when not wearing them to help maintain their shape and continue the stretching process.
Step 3: Wear boots for short intervals
Breaking in new work boots is a gradual process that requires patience and strategic wearing. Your primary goal is to help the leather mold to your feet while minimizing discomfort and potential blisters.
Begin by wearing your new boots for a few hours each day, gradually increasing the duration over several weeks. Alternate between your old and new boots during the break-in period, starting with shorter wear times and gradually increasing as comfort improves. Start by wearing them around the house for short periods. This approach allows your feet to adapt to the new footwear without overwhelming them with a full day of intense use.
Pay close attention to any pressure points or areas of discomfort. If you feel hotspots developing, take the boots off and give your feet a rest. As the days progress, increase the duration of wear gradually. Wear them during light activities first such as walking around the house or running quick errands before transitioning to longer work shifts.
Pro tip: Keep a pair of your old comfortable boots nearby during the break-in period in case you need to switch out if the new boots become too uncomfortable.
This table compares key break-in techniques and their main benefits:
| Technique | Purpose | Primary Benefit |
|---|---|---|
| Wearing with thick socks | Shape boots to feet | Custom fit, reduced blister risk |
| Leather conditioner use | Soften stiff leather | Increased flexibility |
| Gradual wear intervals | Allow adaptation | Minimizes discomfort |
| Flexing key areas by hand | Target trouble spots | Eases movement at flex points |
Step 4: Moisturize and flex key areas
Softening your new work boots requires strategic attention to the most challenging areas of leather that can cause discomfort during initial wear. Your mission is to make the boots more pliable and responsive to your foot’s natural movement.
To ease the break-in process, massage the ankle area with leather conditioner and flex the boots to soften stiff areas. Focus on key flex points like the ankle, heel, and toe box where the boot needs to bend most during walking. Use your hands to gently bend and twist these areas while applying a high-quality leather conditioner. Work the conditioner into the leather using circular motions, paying extra attention to spots that feel particularly stiff or seem prone to creating friction.
Repeat this conditioning and flexing process several times over a few days. As you manipulate the leather, you are essentially training the material to move more naturally with your foot. Think of it like stretching a new muscle each time you bend and condition the boots. This approach helps prevent potential blisters and creates a more comfortable fit that feels custom made for your feet.
Pro tip: Use a clean soft cloth when applying leather conditioner to avoid leaving excess product on the boot surface and ensure even absorption.
Step 5: Test comfort on the job
After weeks of careful breaking in, it is time to put your new work boots through their real world test. This final stage will determine whether your boots are truly ready for full workday performance and demanding conditions.
Test your boots by starting with shorter work shifts to ensure they provide the necessary support and comfort. Once your boots feel comfortable during daily wear, evaluate their performance in actual working conditions to confirm they are ready for extended use. Pay close attention to how your feet feel during these initial work periods. Look for any signs of persistent rubbing, unexpected pressure points, or areas of discomfort that might require additional breaking in.
During this testing phase, keep a spare pair of insoles or bandages handy in case you need quick relief. Monitor how the boots perform across different surfaces and work environments. Some boots might feel great on smooth concrete but behave differently on uneven terrain or wet surfaces. Your goal is to identify any potential issues before they become serious problems that could compromise your comfort or safety.
Pro tip: Bring an extra pair of socks to change midway through your shift if you notice any developing hot spots or areas of friction.
Gear Up for All-Day Comfort With the Right Workwear
Breaking in new boots can be a challenge that calls for patience and care to avoid discomfort and blisters on the job. If you understand the value of a proper break-in process and want to complement your freshly molded boots with durable, comfortable gear that supports you through every demanding workday, you have found the right place. At WorkwearComfort.com, we are dedicated to outfitting hardworking professionals with rugged apparel that delivers both style and function.
Take control of your comfort from head to toe with our wide selection of workwear designed to keep you protected and confident. Whether you need hoodies with UPF 50+ sun protection for outdoor work or women’s workwear crafted to combine strength and statement-making style, our gear helps you perform your best. Don’t settle for less when your work demands durability. Visit WorkwearComfort.com now to explore our collection and invest in apparel that stands up to the same hard work ethic you do every day.
Frequently Asked Questions
How do I ensure my new boots fit properly before breaking them in?
To ensure a proper fit, try on your new boots in person and walk around to assess comfort. Pay attention to areas like your toes and the heel to confirm they don’t rub or feel too tight, adjusting the size if necessary.
What steps should I take to soften my new boots before wearing them?
To soften your new boots, apply a moisturizing leather cream or use a hair dryer on low heat to loosen the leather fibers. Focus on areas that might cause friction, and repeat this process several times to allow the material to become more flexible.
How long should I wear my new boots each day during the break-in period?
Start by wearing your new boots for a few hours each day and gradually increase the time over several weeks. For example, increase the wear time by 30 minutes each day until you can comfortably wear them for a full workday.
What should I do if I start to feel hot spots or discomfort while breaking in my boots?
If you notice hot spots or discomfort, take off your boots immediately to give your feet a rest. You can also consider using thicker socks or applying a protective bandage to the affected area to reduce friction during the break-in period.
How can I test my new boots for all-day comfort before using them at work?
To test your new boots, wear them during shorter work shifts to see how they perform in real-world conditions. Monitor for any signs of rubbing or discomfort, and make adjustments as necessary before committing to longer work periods.
What maintenance should I perform on my boots after breaking them in?
After breaking in your boots, continue to maintain them by applying leather conditioner regularly and checking for any areas that may require attention. This care will extend their lifespan and help keep them comfortable during wear.